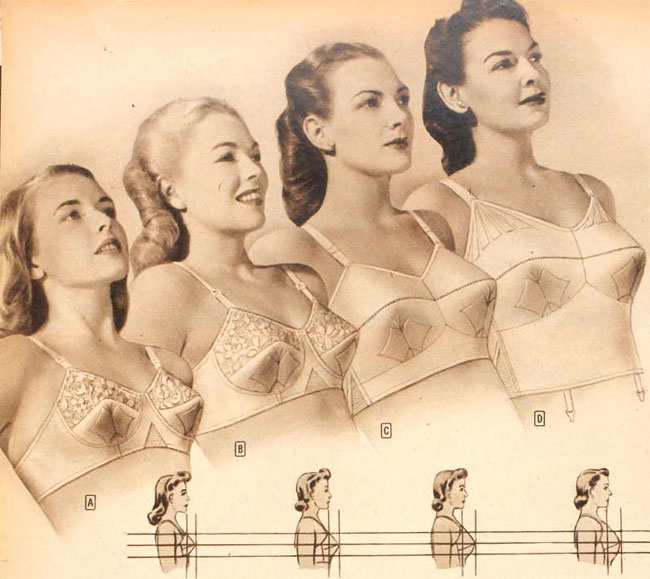
One of my goals this year was to sew my own bras. Finding a bra is soul destroying for many people, and it’s been hell for me because I need a large band and cup. Bras for my size are nearly impossible to find, and the one or two that I can find cost anywhere from $90-150. As a result I have been wearing the incorrect size for years.
Aside: do you know how much it bothers me when people trot out the “n% of women are not wearing the correct bra size!!!??!!” There’s a reason: Bra sizing is not standardised, you can’t just assume you are the same size across all brands. Even if you fit into and use the sizing chart, there’s no guarantee the damn bra will fit! Another reason: bodies are different. Fat and breast tissue are distributed in all matter of different ways across all the bodies in the world.
So, last year I decided the only thing to do would be to sew my own bras. Aside from the major challenge of learning bra construction, finding a pattern to fit me has proven to be incredibly challenging. If I thought ready-to-wear bras were hard to find… bra patterns in my size are non-existent. Remember what I said about bra sizing? It applies to bra patterns as well. I decided to go with the Pin Up Girls Classic pattern, because Beverly Johnson’s Sewing Bras: Construction and Fit class use this pattern (her one). I bought two of her bra kits and a couple of underwires, then upon figuring out that the largest band size (48) would not fit me, I aborted the project.
When my last couple of bras popped their underwires I knew I had to resume my bra making goals. I measured myself again and worked out I’d be a 54F based on the Pin Up Girls sizing system. Previously I’d been wearing 44G bras from Marks & Spencer, and even then the wires did not sit comfortably under my breast. I had no idea how this was going to work out. I graded the 48F pieces up three sizes and sewed up the bra while religiously watching the Craftsy course. It’s practically compulsory if you want to learn to make your own bras – and I’ve been sewing for 20 years! I put the bra on… and the cup was too big. My mind exploded. Bra sizing, what the fuck?
With help from Beverly (it’s incredible how much time she dedicates to answering questions, and truly one of the best reasons for purchasing the class) and a bra making group on facebook, I went down a cup size. From there it took me 5 pattern versions undertaking various alterations to get a reasonably well fitting and comfortable bra. The bridge still isn’t tacking to my chest wall but I’m not being stuck in my bingo wings by vicious wires and I don’t feel like I’m going to die after wearing my bras for 6 hours.
I’ve altered the PUG Classic pattern significantly, and this is the norm rather than the exception in the bra making world. Why bother making your own bras unless they are tailored to suit you? I should have properly kept track of my alterations but I know I:
- Darted out excess in upper cup.
- Took a dart out of the outside of the cup (upper and lower).
- Narrowed the bridge at the top, and widened it at the bottom (I will widen even more next time).
- Split the lower cup to allow the breast to settle into the cup.
- East/ west alteration to project the tissue forward. Yep, east/ west refers to the direction the breasts point!
- Rounded the cross cup seam so it was less “pointy”.
- Added a gothic arch to the band (good for those with big high tummies).
- Raised the height under the arm and added a back strap extension.
- Darted out excess under arm in the frame.
- Widened the base of the straps where they attach to the upper cup.
I’d love to try other patterns but the problem is they simply don’t come anywhere near my size. I will have to grade up regardless of which pattern I choose. Another reason why it really shits me when people tell me to “make my own” when ready-to-wear doesn’t come in my size – PATTERNS DON’T EITHER! I can use the Classic bra and morph it in a few different ways – I’ve already drafted a four piece cup (with power bar) and a horizontal seamed bra. When I can afford it, I want to buy the Bravo Bra #2 and the Queen Bra Elite – the two other patterns that come up close to my size.
Bra making supplies are scant in Australia and shipping from Canada and the US can be prohibitive. I have purchased my pattern, kits, and supplies from Sew Squirrel, who have amazing customer service. Duoplex is my favourite material by far as it has nearly no stretch, is soft, and requires no lining; it is available from Sew Squirrel in black and white by the yard and in other colours in the kits. I’ve also purchased fabric and findings from Booby Traps, who have the best name, and while they don’t stock duoplex they do have a range of tricot, lining fabrics, elastics, and findings in a variety of colours.
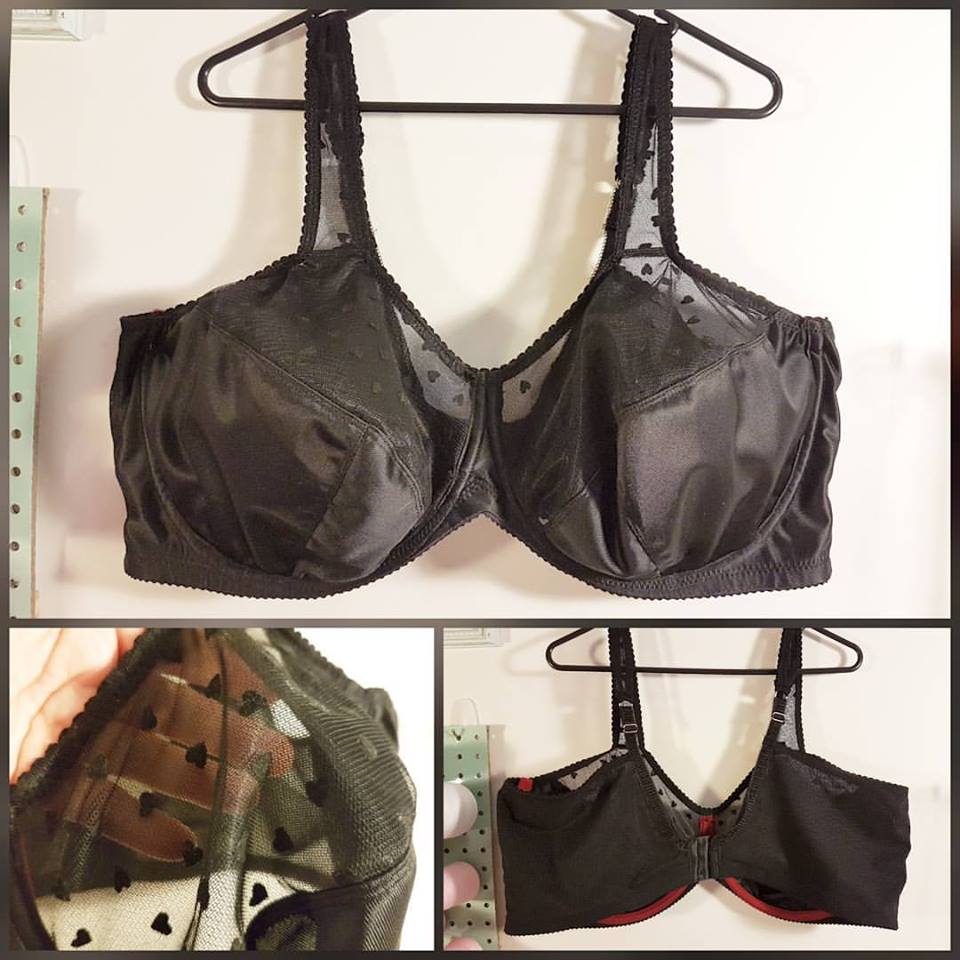
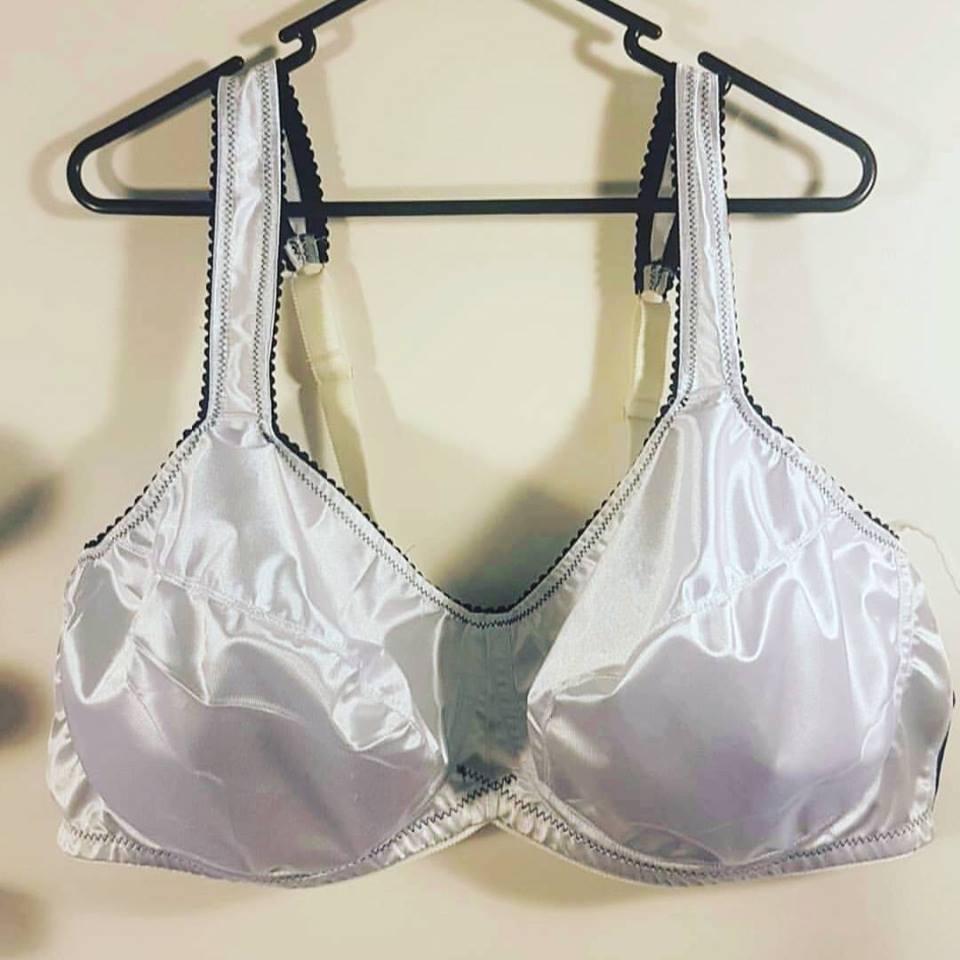
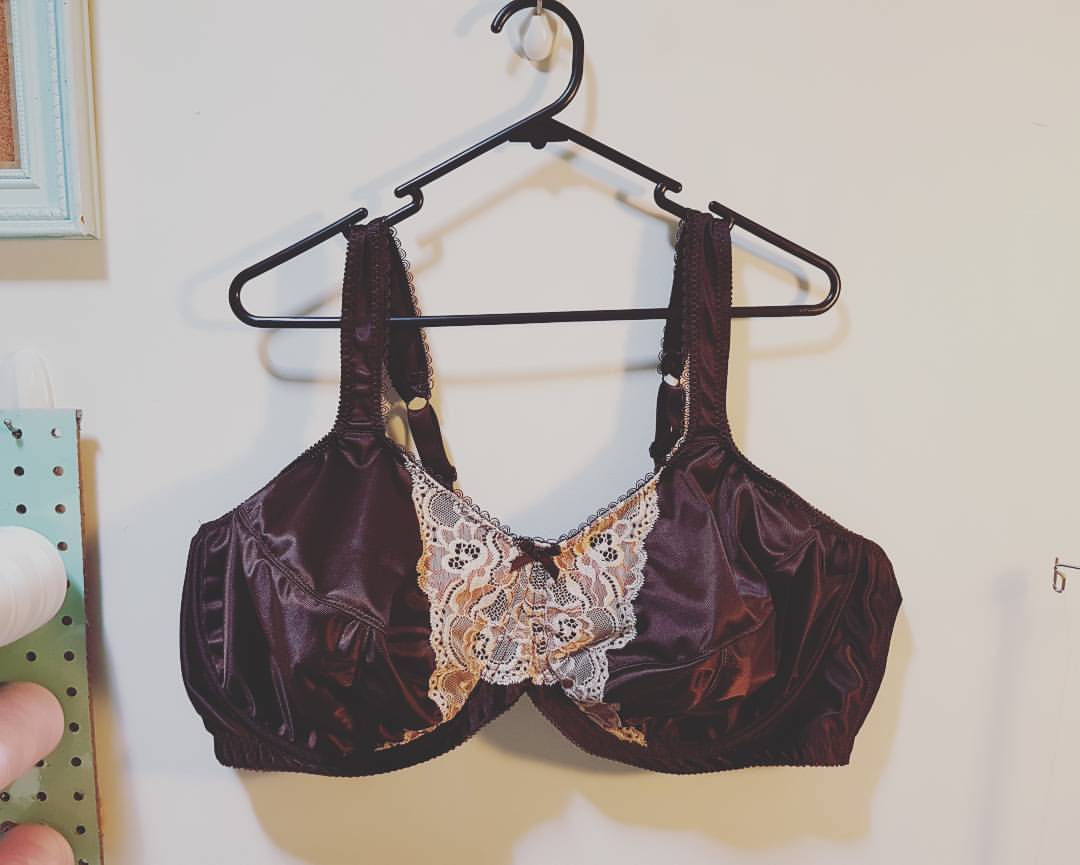
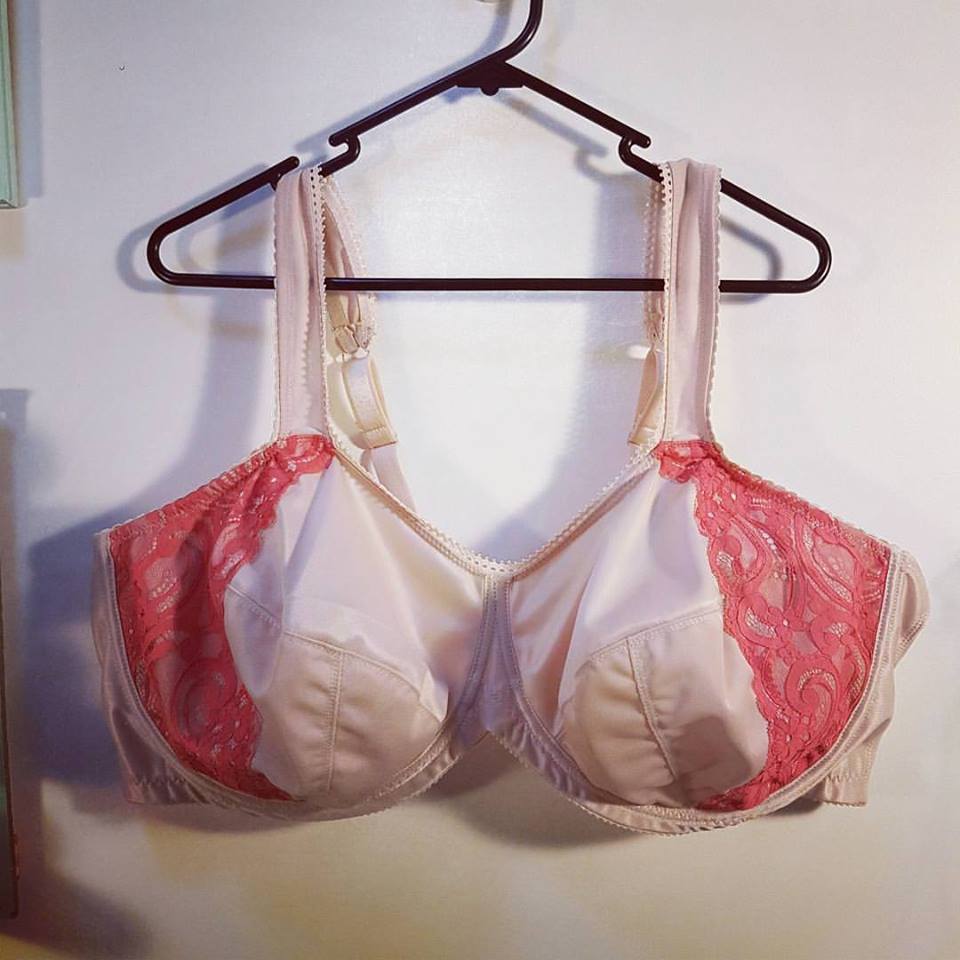
I’ve worn my self made bras exclusively over the last two weeks and even the early versions are more comfortable than my shop bought bras. I have so many plans for new bras, it’s really exciting to have control over the design when the only bras you’ve been wearing have been black or beige for the last 10 years!! The black bra above is my favourite and the most comfortable by far. The wider back band and strap extension make a huge difference because I don’t feel like the band is disappearing into my back rolls any longer; it’s truly incredible to take my bra off at the end of the day and not feel like I’ve been caught in a mouse trap for an eternity!
Well done you for persevering. The results were worth it in the end. It took me about five tries before I ended up with a well modified pattern suitable for the duoplex. I still haven’t figured out the adjustments needed for a fabric with stretch, like bonded foam or tricot.
I have a printed copy of the Bravo Bra 2 I ordered a couple of years ago from Bravo Bella that I’d be happy to send to you if you want it? I’m not asking anything for it. It didn’t work out for me, so I moved on to another pattern which did work. It may have been my fabric choice that let me down- it’s sized for stretch fabrics whereas the PUG patterns work better with stable, non-stretch fabrics. It’s uncut and all there. I believe it’s US sizing, not UK sizing, if that changes your thoughts about it. At least you have a pattern you can compare it to to see if it will work for you. The offer is there if you want it. :)
I found your blog looking for RTW bras for superfats. Wish I had the sewing skills to pull off making my own! You did beautiful work and I’m glad they’re working out for you!
Great Job..
Lahore Chat Room
Karachi Chat Room
Pakistani Chat Rooms
Hi my name is Lori Strout I live in the U.S. and I get all of my bra sewing stuff from sewingchest.co.uk She is great and it is like a real store only online. She ships world wide. Okay I sew for 12 other women I have to grade up and down all the time, Have you heard of The Maya Bra sized from 28AA all the way up to 44K use your measurements add a few inches or centimeters and I made a bra that was 60K for a client. I also took that 44K and took out a few inches and made my Daughter-in-law a 38M yep I said M and she isn’t even breast feeding those are what God gave her.The Maya Bra is FREE yes I said FREE from afiatelier.com It has a very round cup not pointy. It is in French and English and a few other languages look for the bra on the page and it prints right to your little ole computer. Have you joined Bra Making Forum please do there are some people out there that this can be done